Claims - Snap your Receipts
Snap Receipts
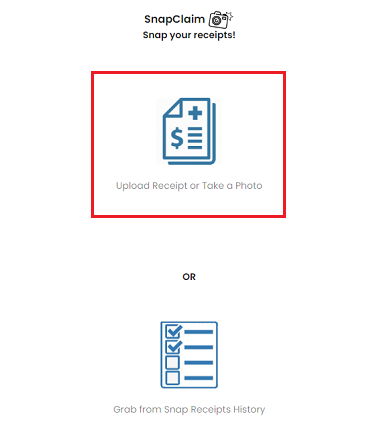
- Click [SnapClaim] icon button on the dashboard page (Pic 1) to begin
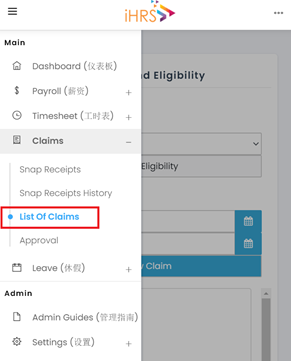
- Alternative you can click on [Snap Receipts] on the left menu (Pic 2) to access snap a receipt page
To Snap Receipt:

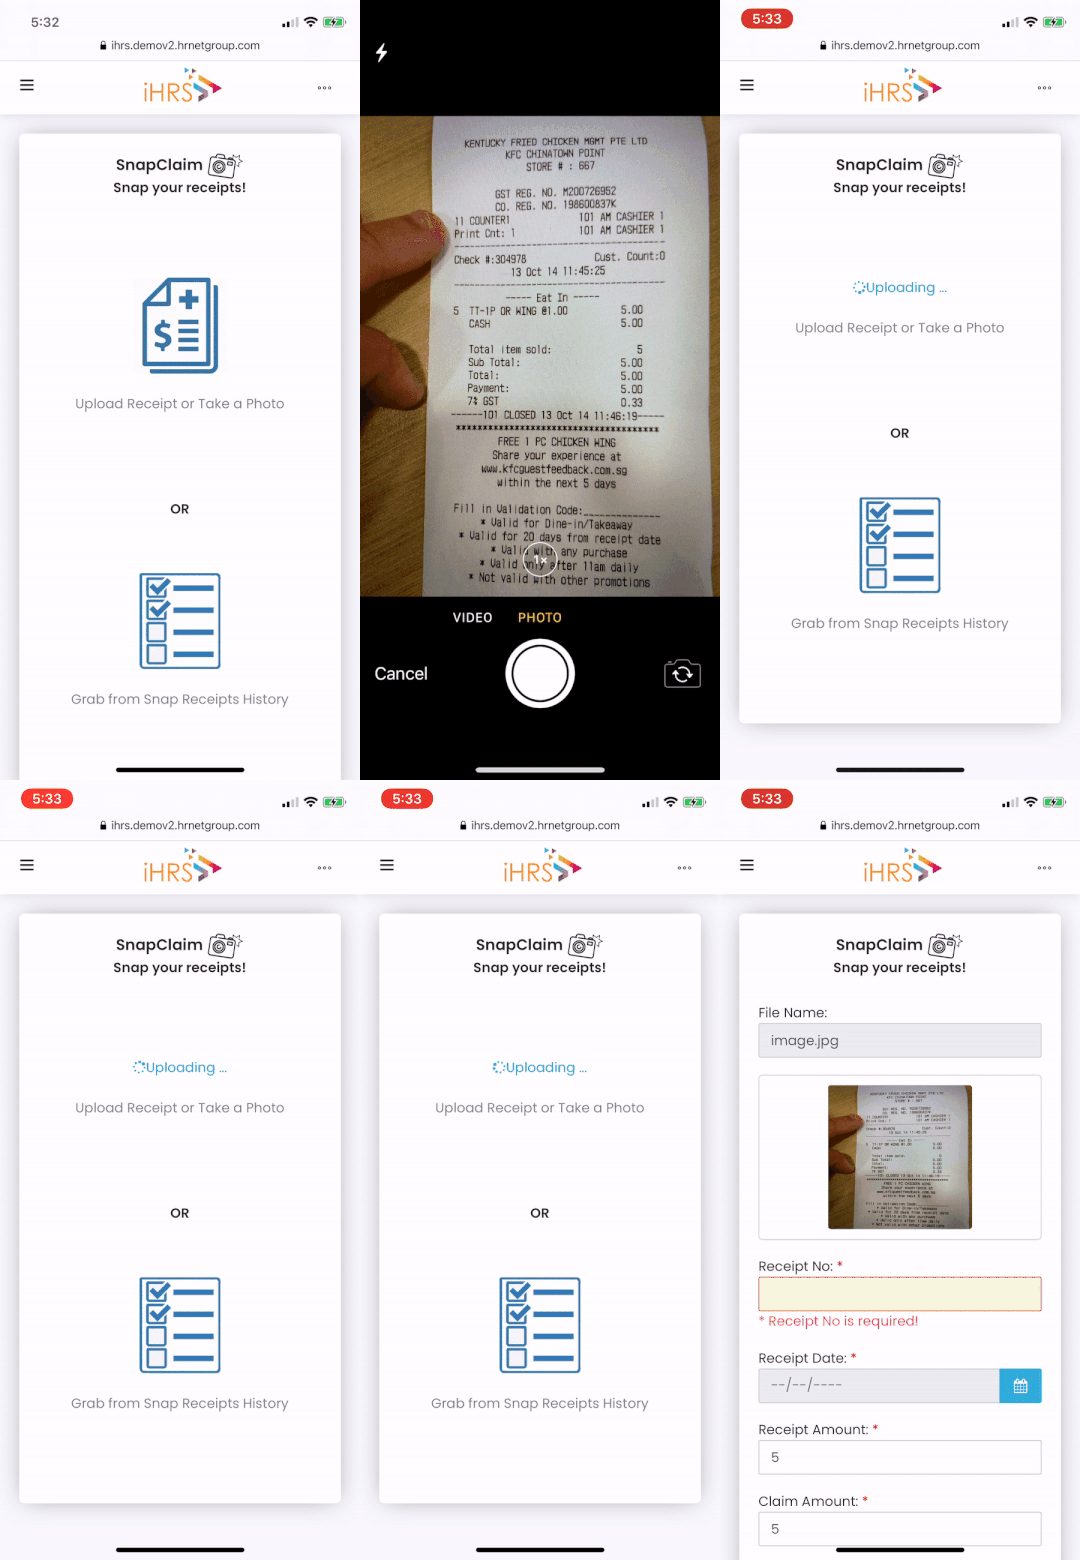
- Click [Upload Receipt or Take a Photo] to begin.

- To upload a receipt, click [Browse]/ [Photo Library] to find the receipt to upload.
- OR click [Take Photo] (only available on mobile) to snap a receipt.
- Fill in the remaining receipt details. Optional: Use [Prefill Claim Details] if you wish to fill in more details for claiming purposes, otherwise you can also fill in the details before submitting your receipt.
- Click the following options:-
[Save] - save the receipt for future use.
[Add To New Claim] - submit your receipt right away.
[Add To Existing Claim] - add the receipt to an existing pending claim report
Submit Your Receipts
To Retrieve Your Saved Receipts for submission:
- Click [Snap Claim] icon button on the dashboard page, and choose [Grab From Snap Receipt History] (Pic 1) to begin.
- Alternative you can click on [Snap Receipts History] on the left menu (Pic 2) to access your existing receipts.

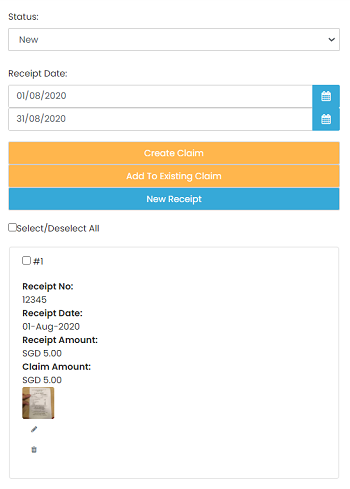
- In this page, you are able to view all the receipts that has not been submitted.
- To view a list of submitted receipts, select "used" in the status column.
- Select the receipts to submit by ticking the "select all" checkbox or you can selectively tick the receipts you want to submit.
- Click [Create Claim] to start a new claim report or [Add to Existing Claim] to add the selected receipts to an existing pending claim report

To Submit An Existing Pending Claim Report:

- Click on [List Of Claims] on the left menu (shown as above) to access your existing claim reports.
